Sofie Views
Lobby View
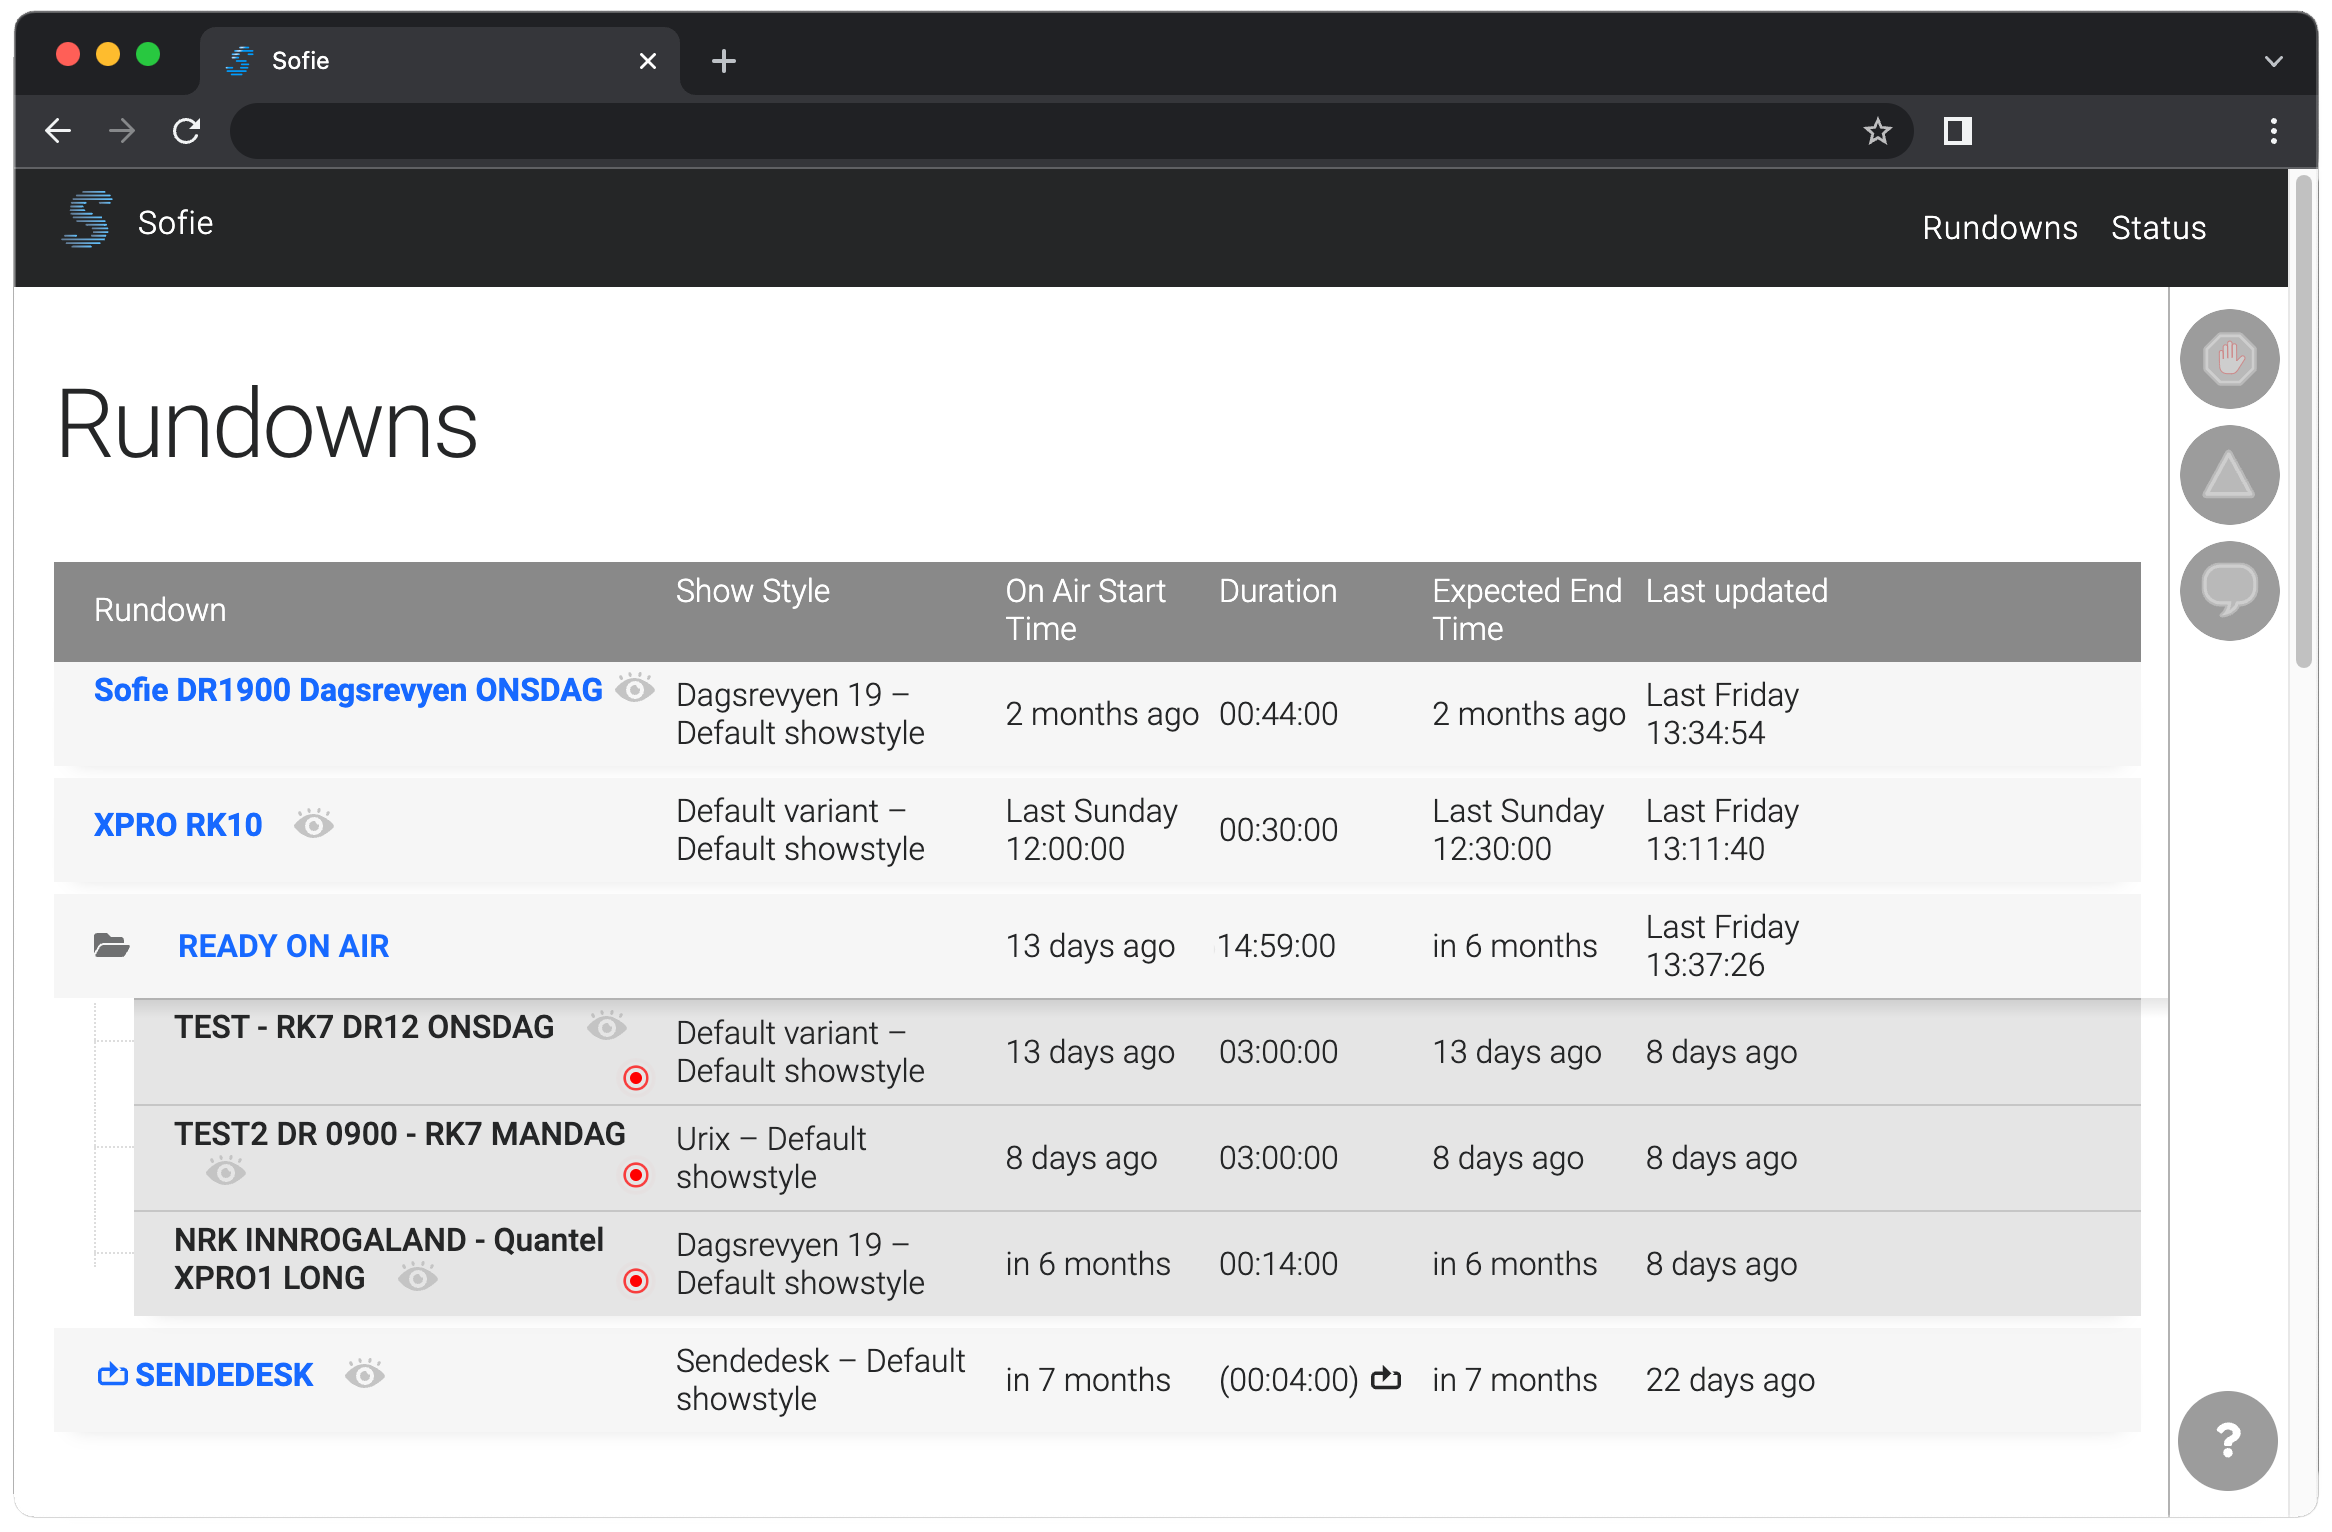
All existing rundowns are listed in the Lobby View.
Rundown View
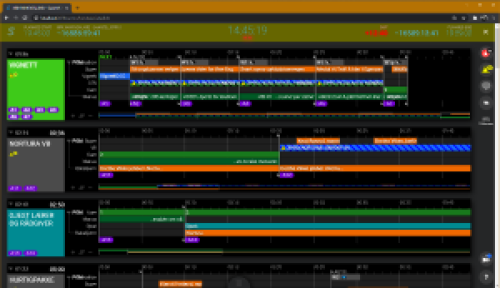
The Rundown View is the main view that the producer is working in.
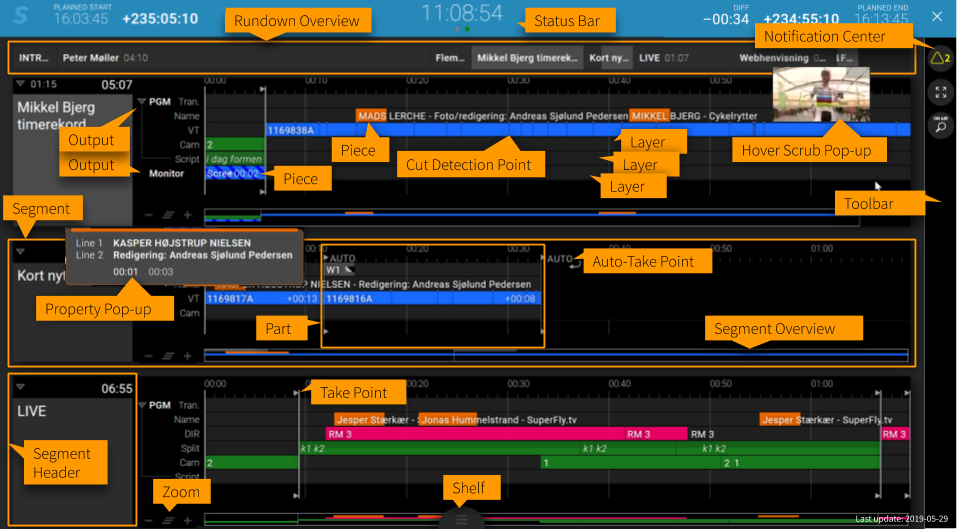

Take Point
The Take point is currently playing Part in the rundown, indicated by the "On Air" line in the GUI.
What's played on air is calculated from the timeline objects in the Pieces in the currently playing part.
The Pieces inside of a Part determines what's going to happen, the could be indicating things like VT:s, cut to cameras, graphics, or what script the host is going to read.
You can TAKE the next part by pressing F12 or the Numpad Enter key.
Next Point
The Next point is the next queued Part in the rundown. When the user clicks Take, the Next Part becomes the currently playing part, and the Next point is also moved.
Change the Next point by right-clicking in the GUI, or by pressing (Shift +) F9 & F10.
Freeze-frame Countdown
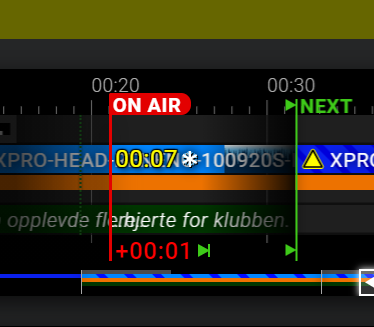
If a Piece has more or less content than the Part's expected duration allows, an additional counter with a Snowflake icon will be displayed, attached to the On Air line, counting down to the moment when content from that Piece will freeze-frame at the last frame. The time span in which the content from the Piece will be visible on the output, but will be frozen, is displayed with an overlay of icicles.
Lookahead
Elements in the Next point (or beyond) might be pre-loaded or "put on preview", depending on the blueprints and playout devices used. This feature is called "Lookahead".
Storyboard Mode
In the top-right corner of the Segment, there's a button controlling the display style of a given Segment. The default display style of a Segment can be indicated by the Blueprints, but the User can switch to a different mode at any time. You can also change the display mode of all Segments at once, using a button in the bottom-right corner of the Rundown View.

The Storyboard mode is an alternative to the default Timeline mode. In Storyboard mode, the accurate placement in time of each Piece is not visualized, so that more Parts can be visualized at once in a single row. This can be particularly useful in Shows without very strict timing planning or where timing is not driven by the User, but rather some external factor; or in Shows where very long Parts are joined with very short ones: sports, events and debates. This mode also does not visualize the history of the playback: rather, it only shows what is currently On Air or is planned to go On Air.
Storyboard mode selects a "main" Piece of the Part, using the same logic as the Presenter View, and presents it with a larger, hover-scrub-enabled Piece for easy preview. The countdown to freeze-frame is displayed in the top-right hand corner of the Thumbnail, once less than 10 seconds remain to freeze-frame. The Transition Piece is displayed on top of the thumbnail. Other Pieces are placed below the thumbnail, stacked in order of playback. After a Piece goes off-air, it will dissapear from the view.
If no more Parts can be displayed in a given Segment, they are stacked in order on the right side of the Segment. The User can scroll through thse Parts by click-and-dragging the Storyboard area, or using the mouse wheel - Alt+Wheel, if only a vertical wheel is present in the mouse.
List View Mode
Another mode available to display a Segment is the List View. In this mode, each Part and it's contents are being displayed as a mini-timeline and it's width is normalized to fit the screen, unless it's shorter than 30 seconds, in which case it will be scaled down accordingly.

In this mode, the focus is on the "main" Piece of the Part. Additional Lower-Third content that is not spanning the entire Part (is not infinite) will be displayed on top of the main Piece. All other content can be displayed to the right of the mini-timeline as a set of indicators, one per every Layer. Clicking on those indicators will show a pop-up with the Pieces so that they can be investigated using hover-scrub. Indicators can be also shown for Ad-Libs assigned to a Part, for easier discovery by the User. Which Layers should be shown in the columns can be decided in the Settings ● Layers area. A special, larger indicator is reserved for the Script piece, which can be useful to display so-called out-words.
If a Part has an in-transition Piece, it will be displayed to the left of the Part's Take Point.
This view is designed to be used in productions that are mixing pre-planned and timed segments with more free-flowing production or mixing short live in-camera links with longer pre-produced clips, while trying to keep as much of the show in the viewport as possible, at the expense of hiding some of the content from the User and the duration of the Part on screen having no bearing on it's width. This mode also allows Sofie to visualize content beyond the planned duration of a Part.
The Segment header area also shows the expected (planned) durations for all the Parts and will also show which Parts are sharing timing in a timing group using a ⌊ symbol in the place of a counter.
All user interactions work in the Storyboard and List View mode the same as in Timeline mode: Takes, AdLibs, Holds and moving the Next Point around the Rundown.
Segment Header Countdowns
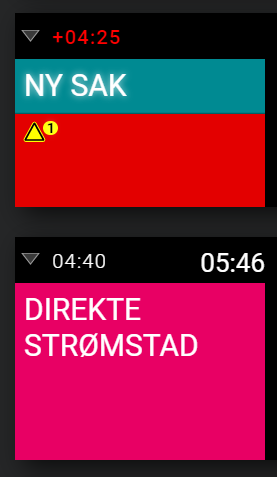
- Left: Segment Time Budget
- Right: Segment Countdown
Clock on the left is an indicator of how much time has been spent playing Parts from that Segment in relation to how much time was planned for Parts in that Segment. If more time was spent playing than was planned for, this clock will turn red, there will be a + sign in front of it and will begin counting upwards.
Clock on the right is a countdown to the beginning of a given segment. This takes into account unplayed time in the On Air Part and all unplayed Parts between the On Air Part and a given Segment. If there are no unplayed Parts between the On Air Part and the Segment, this counter will disappear.
In the illustration above, the first Segment (Ny Sak) has been playing for 4 minutes and 25 seconds longer than it was planned for. The second segment (Direkte Strømstad) is planned to play for 4 minutes and 40 seconds. There are 5 minutes and 46 seconds worth of content between the current On Air line (which is in the first Segment) and the second Segment.
If you click on the Segment header countdowns, you can switch the Segment Countdown to a Segment OnAir Clock where this will show the time-of-day when a given Segment is expected to air.
Rundown Dividers
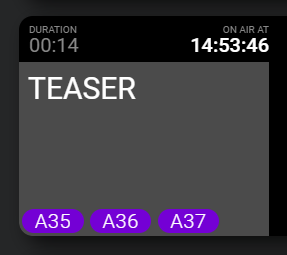
When using a workflow and blueprints that combine multiple NRCS Rundowns into a single Sofie Rundown (such as when using the "Ready To Air" functionality in AP ENPS), information about these individual NRCS Rundowns will be inserted into the Rundown View at the point where each of these incoming Rundowns start.

For reference, these headers show the Name, Planned Start and Planned Duration of the individual NRCS Rundown.
Shelf
The shelf contains lists of AdLibs that can be played out.
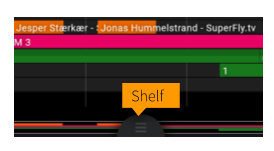
The Shelf can be opened by clicking the handle at the bottom of the screen, or by pressing the TAB key
Shelf Layouts
The Rundown View and the Detached Shelf View UI can have multiple concurrent layouts for any given Show Style. The automatic selection mechanism works as follows:
- select the first layout of the
RUNDOWN_LAYOUTtype, - select the first layout of any type,
- use the default layout (no additional filters), in the style of
RUNDOWN_LAYOUT.
To use a specific layout in these views, you can use the ?layout=... query string, providing either the ID of the layout or a part of the name. This string will then be mached against all available layouts for the Show Style, and the first matching will be selected. For example, for a layout called Stream Deck layout, to open the currently active rundown's Detached Shelf use:
http://localhost:3000/activeRundown/studio0/shelf?layout=Stream
The Detached Shelf view with a custom DASHBOARD_LAYOUT allows displaying the Shelf on an auxiliary touch screen, tablet or a Stream Deck device. A specialized Stream Deck view will be used if the view is opened on a device with hardware characteristics matching a Stream Deck device.
The shelf also contains additional elements, not controlled by the Rundown View Layout. These include Buckets and the Inspector. If needed, these components can be displayed or hidden using additional url arguments:
| Query parameter | Description |
|---|---|
| Default | Display the rundown layout (as selected), all buckets and the inspector |
?display=layout,buckets,inspector | A comma-separated list of features to be displayed in the shelf |
?buckets=0,1,... | A comma-separated list of buckets to be displayed |
display: Available values are:layout(for displaying the Rundown Layout),buckets(for displaying the Buckets) andinspector(for displaying the Inspector).buckets: The buckets can be specified as base-0 indices of the buckets as seen by the user. This means that?buckets=1will display the second bucket as seen by the user when not filtering the buckets. This allows the user to decide which bucket is displayed on a secondary attached screen simply by reordering the buckets on their main view.
Note: the Inspector is limited in scope to a particular browser window/screen, so do not expect the contents of the inspector to sync across multiple screens.
For the purpose of running the system in a studio environment, there are some additional views that can be used for various purposes:
Sidebar Panel
Switchboard
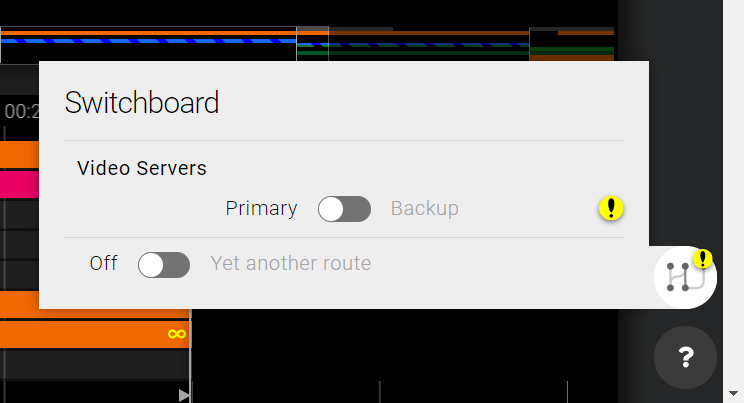
The Switchboard allows the producer to turn automation On and Off for sets of devices, as well as re-route automation control between devices - both with an active rundown and when no rundown is active in a Studio.
The Switchboard panel can be accessed from the Rundown View's right-hand Toolbar, by clicking on the Switchboard button, next to the Support panel button.
Technically, the switchboard activates and deactivates Route Sets. The Route Sets are grouped by Exclusivity Group. If an Exclusivity Group contains exactly two elements with the ACTIVATE_ONLY mode, the Route Sets will be displayed on either side of the switch. Otherwise, they will be displayed separately in a list next to an Off position. See also Settings ● Route sets.
Prompter View
/prompter/:studioId
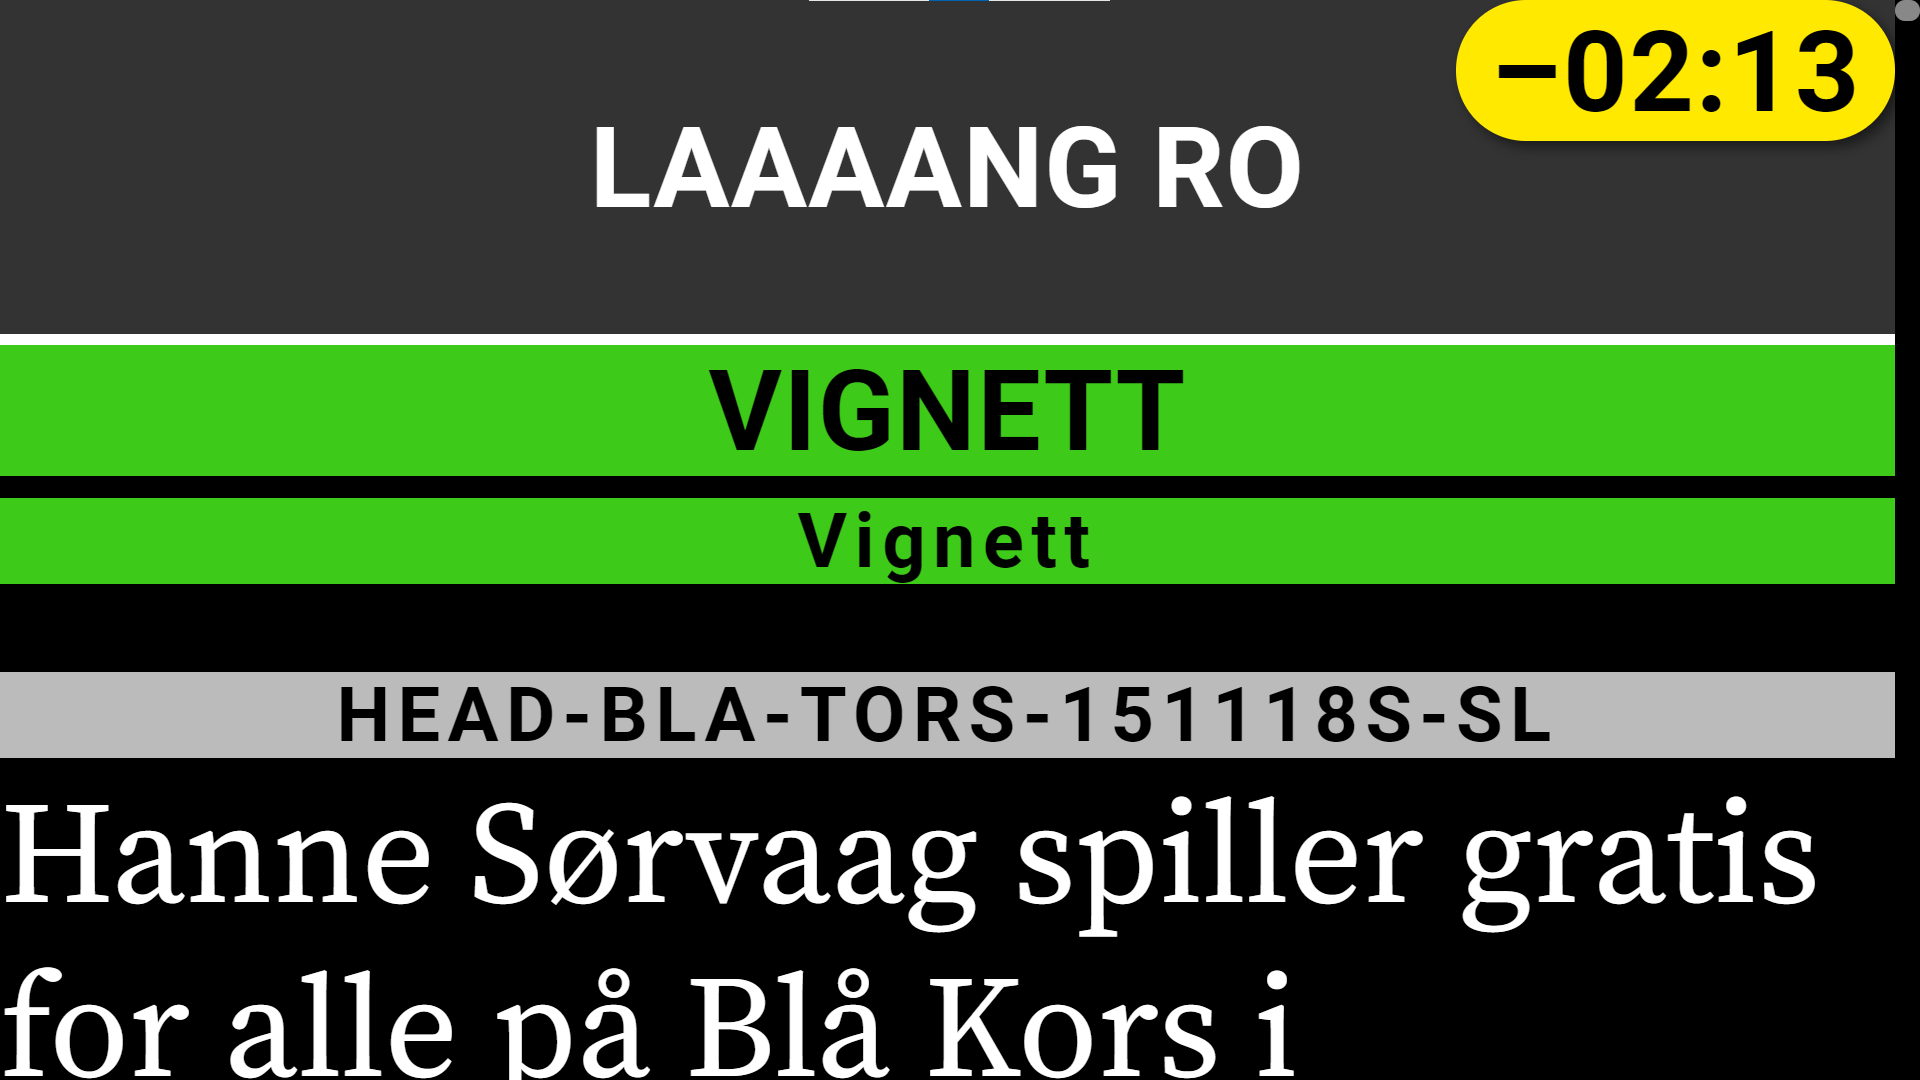
A fullscreen page which displays the prompter text for the currently active rundown. The prompter can be controlled and configured in various ways, see more at the Prompter documentation. If no Rundown is active in a given studio, the Screensaver will be displayed.
Presenter View
/countdowns/:studioId/presenter
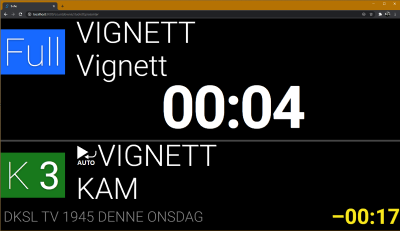
A fullscreen page, intended to be shown to the studio presenter. It displays countdown timers for the current and next items in the rundown. If no Rundown is active in a given studio, the Screensaver will be shown.
Presenter View Overlay
/countdowns/:studioId/overlay
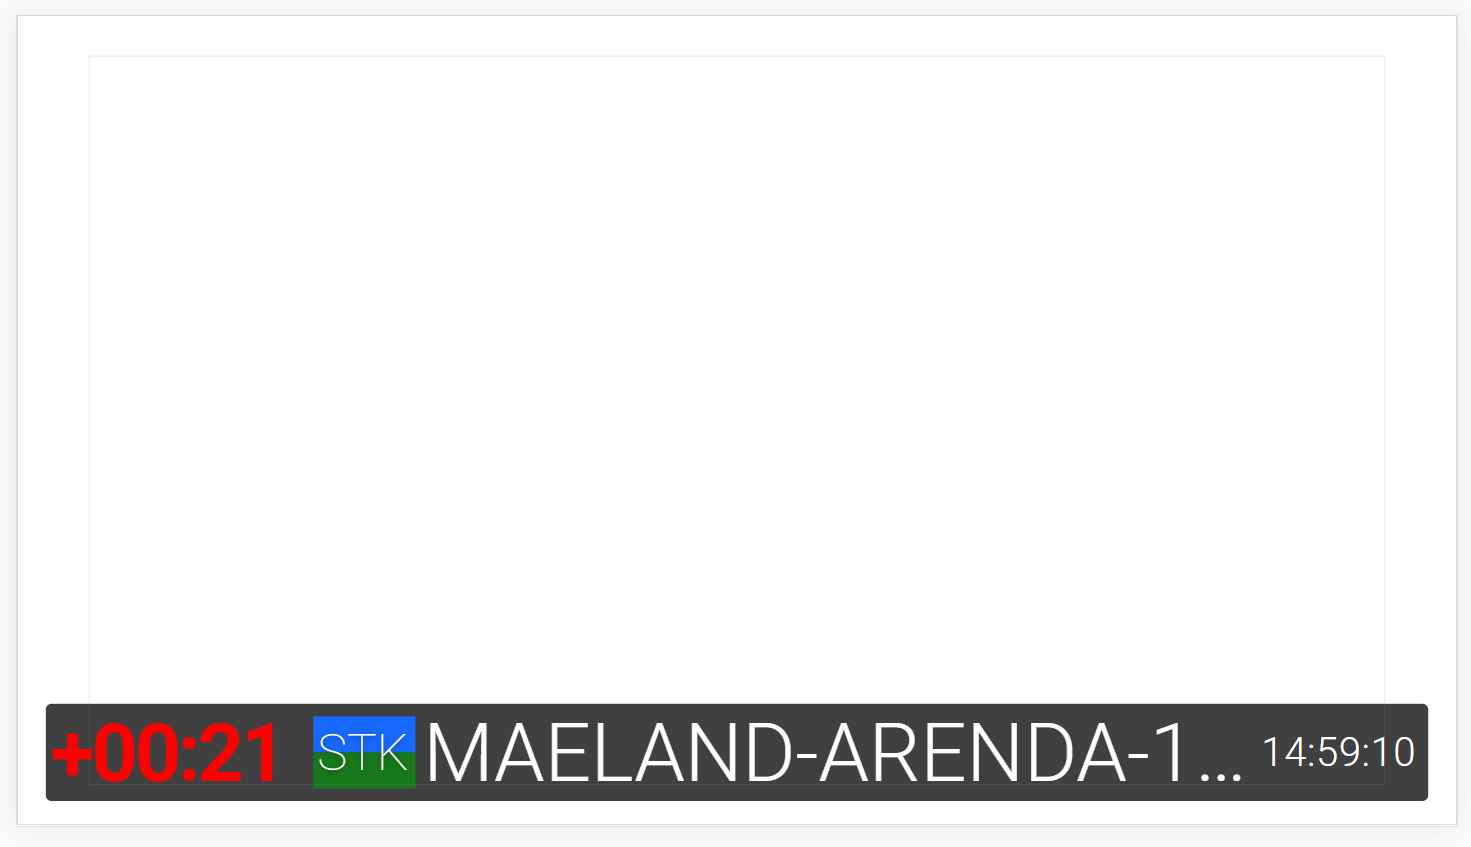
A fullscreen view with transparent background, intended to be shown to the studio presenter as an overlay on top of the produced PGM signal. It displays a reduced amount of the information from the regular Presenter screen: the countdown to the end of the current Part, a summary preview (type and name) of the next item in the Rundown and the current time of day. If no Rundown is active it will show the name of the Studio.
Active Rundown View
/activeRundown/:studioId

A page which automatically displays the currently active rundown. Can be useful for the producer to have on a secondary screen.
Active Rundown – Shelf
/activeRundown/:studioId/shelf
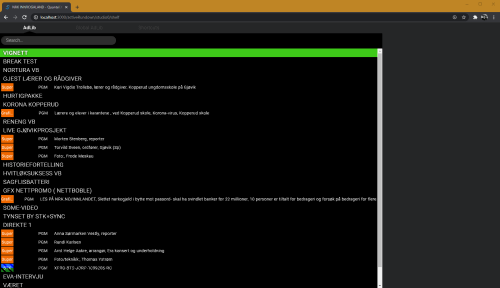
A view which automatically displays the currently active rundown, and shows the Shelf in full screen. Can be useful for the producer to have on a secondary screen.
A shelf layout can be selected by modifying the query string, see Shelf Layouts.
Specific Rundown – Shelf
/rundown/:rundownId/shelf
Displays the shelf in fullscreen for a rundown
Screensaver
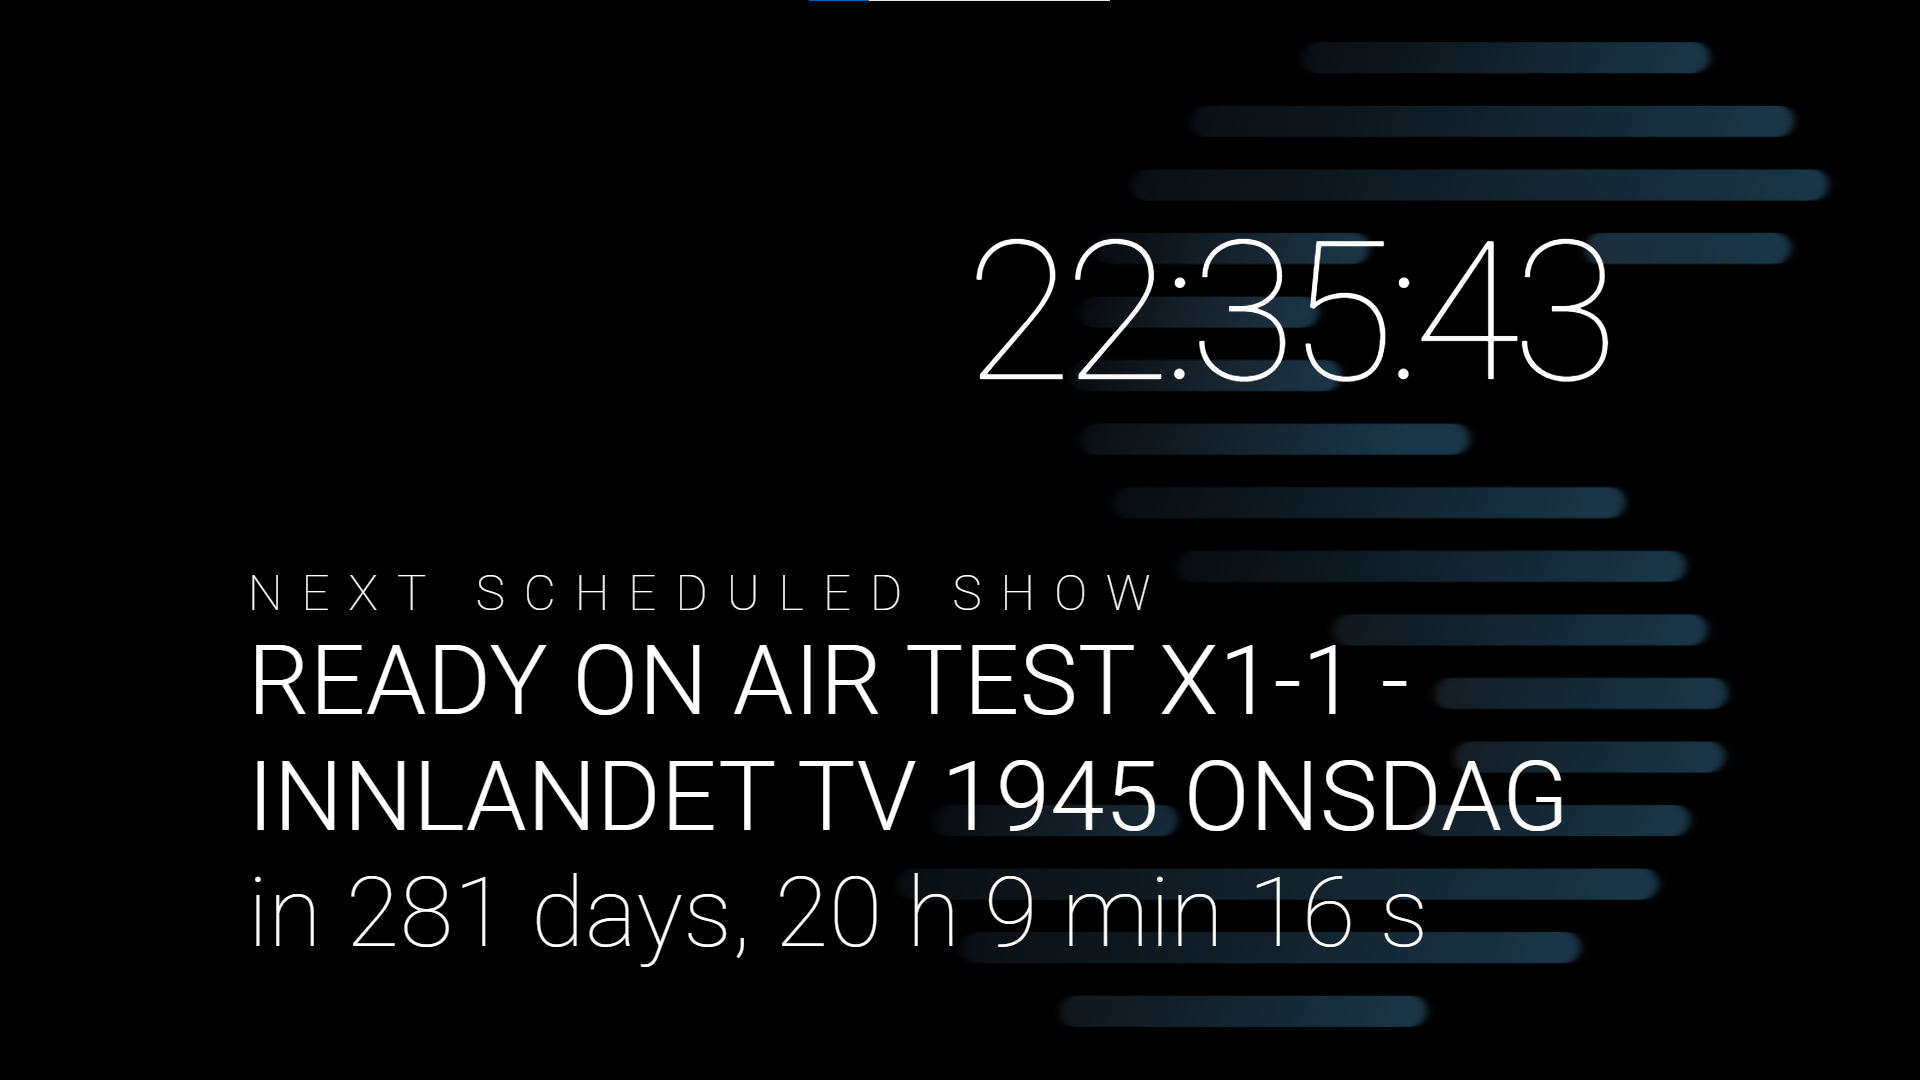
When big screen displays (like Prompter and the Presenter screen) do not have any meaningful content to show, an animated screensaver showing the current time and the next planned show will be displayed. If no Rundown is upcoming, the Studio name will be displayed.
System Status
Documentation for this feature is yet to be written.
System and devices statuses are displayed here.
An API endpoint for the system status is also available under the URL /health
Media Status View
Documentation for this feature is yet to be written.
This page displays media transfer statuses.
Message Queue View
Documentation for this feature is yet to be written.
Sofie Core can send messages to external systems (such as metadata, as-run-logs) while on air.
These messages are retained for a period of time, and can be reviewed in this list.
Messages that was not successfully sent can be inspected and re-sent here.
User Log View
The user activity log contains a list of the user-actions that users have previously done. This is used in troubleshooting issues on-air.
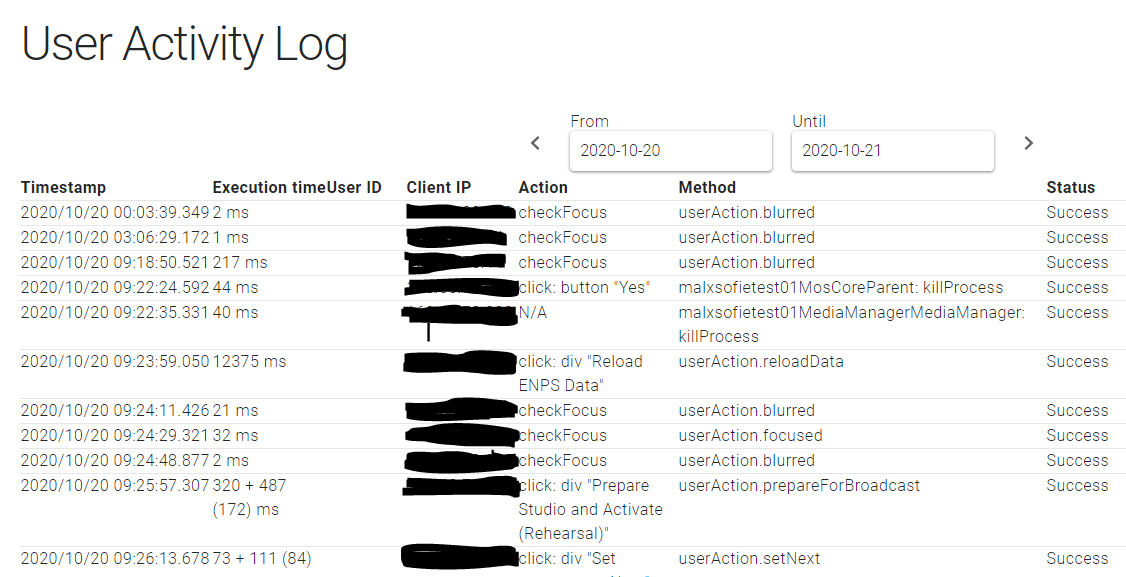
Columns, explained
Execution time
The execution time column displays coreDuration + gatewayDuration (timelineResolveDuration)":
- coreDuration : The time it took for Core to execute the command (ie start-of-command 🠺 stored-result-into-database)
- gatewayDuration : The time it took for Playout Gateway to execute the timeline (ie stored-result-into-database 🠺 timeline-resolved 🠺 callback-to-core)
- timelineResolveDuration: The duration it took in TSR (in Playout Gateway) to resolve the timeline
Important to note is that gatewayDuration begins at the exact moment coreDuration ends.
So coreDuration + gatewayDuration is the full time it took from beginning-of-user-action to the timeline-resolved (plus a little extra for the final callback for reporting the measurement).
Action
Describes what action the user did; e g pressed a key, clicked a button, or selected a meny item.
Method
The internal name in Sofie Core of what function was called
Status
The result of the operation. "Success" or an error message.
Evaluations
When a broadcast is done, users can input feedback about how the show went in an evaluation form.
Evaluations can be configured to be sent to Slack, by setting the "Slack Webhook URL" in the Settings View under Studio.
Settings View
The Settings View is only available to users with the Access Level set correctly.